找到
14
篇与
Ei
相关的结果
-

-
移动云盘分享的链接信息获取接口请求体/响应体加密及解密 实现目的 有没有过这样的体验?手里攥着几十上百个网盘分享链接,要一个个点进页面、手动确认转存到自己的网盘——重复的操作像流水线作业,不仅浪费时间,而且还可能会漏掉文件。所以搞个自动转存脚本是非常有必要的。 打开分享链接->点击F12->查看网络,$[阿鲁表情]::(哭泣) 网盘的分享链接数据居然全是加密的。观察了一下加密字符好像是base64,直接一手解码,乱码!!!作为一个对逆向工程一窍不通的开发者,这已经超出了我的能力范围。 既然自己搞不定,不如试试“AI”。刚好试试最近热门的Gork.我把收集到的几条请求体、响应体密文整理好,清晰标注了获取场景,然后一股脑发给了Gork。 让我惊喜的是,Gork不仅精准识别出这些密文来自哪个网盘站点,还直接给出了对应的加密算法类型。我拿着密钥代入算法解密,结果发现解密失败$[阿鲁表情]::(中指)。 我只能继续问Gork,让它提供判断加密算法和密钥的参考来源。好在Gork很配合,直接给出了几个链接,包含GitHub及CSDN的链接。将几个站点都查看了一遍,选择了最简单的,文件名清晰且代码精简。 经过测试,解密可以使用,但是加密报错。将问题再扔给Gork,修复了即便终于给了我可以使用的代码,自己再整合一下就完成了转存分享中最难的部分$[阿鲁表情]::(得意)。 演示链接 链接: https://yun.139.com/shareweb/#/w/i/2qidG1XEkUKi0 提取码:d78q 复制内容打开中国移动云盘手机APP,操作更方便哦 解密解密分析 项目说明算法AES-128-CBC + PKCS7 填充密钥"PVGDwmcvfs1uV3d1"(UTF-8 编码)IV随机,前 16 字节拼接在密文前密文Base64 解码后第 17 字节起编码整体 Base64(标准,无 URL-safe)加解密代码 需要安装crypto-js库 const CryptoJS = require("crypto-js"); // 新版外链接口固定密钥 const FIXED_KEY = "PVGDwmcvfs1uV3d1"; /** * 移动云盘新版外链加密(OutLink) * @param {string} plaintextJson 明文JSON字符串 * @returns {string} 最终的Base64密文(和官方App一模一样) */ function encryptOutLink(plaintextJson) { // 1. 生成随机IV(16字节) const iv = CryptoJS.lib.WordArray.random(16); // 2. AES-128-CBC 加密 const encrypted = CryptoJS.AES.encrypt( plaintextJson, CryptoJS.enc.Utf8.parse(FIXED_KEY), { iv: iv, mode: CryptoJS.mode.CBC, padding: CryptoJS.pad.Pkcs7 } ); // 3. 把 IV(16字节) + 密文 拼接起来 const ivAndCiphertext = iv.concat(encrypted.ciphertext); // 4. 整体转Base64 → 这就是最终发出去的字符串 return ivAndCiphertext.toString(CryptoJS.enc.Base64); } /** * 解密移动云盘新版外链(OutLink) * @param {string} encryptedBase64 响应体的 Base64 字符串(可能带空格) * @returns {string} 解密后的明文 JSON */ function decryptOutLink(encryptedBase64) { try { // 1. 清理 Base64 const cleanB64 = encryptedBase64.replace(/\s+/g, '');; // 2. Base64 解码 → WordArray const combined = CryptoJS.enc.Base64.parse(cleanB64); const totalLength = combined.sigBytes; // 总字节数 // 3. 提取 IV(前 16 字节 = 4 words)和密文(剩余) const ivBytes = combined.sigBytes / 4; // 每个 word 4 字节 const iv = CryptoJS.lib.WordArray.create(combined.words.slice(0, 4)); // 前 16 字节 const ciphertext = CryptoJS.lib.WordArray.create( combined.words.slice(4), totalLength - 16 // 剩余长度 ); // 4. AES-128-CBC 解密 const decrypted = CryptoJS.AES.decrypt( { ciphertext: ciphertext }, CryptoJS.enc.Utf8.parse(FIXED_KEY), { iv: iv, mode: CryptoJS.mode.CBC, padding: CryptoJS.pad.Pkcs7 } ); // 5. 转 UTF-8 字符串(JSON) const plaintext = decrypted.toString(CryptoJS.enc.Utf8); if (!plaintext) { throw new Error("解密为空,可能是填充错误或密钥不对"); } return plaintext; } catch (error) { throw new Error(`解密失败: ${error.message}`); } } // 测试 // getOutLinkGeneral 请求体加密 const test1 = JSON.stringify({ getOutLinkGeneralReq: { linkID: "2qidFfUiXYAas", isPasswd: 1 } }); const res1 = encryptOutLink(test1); console.log("getOutLinkGeneral 请求体加密结果:", res1); console.log("getOutLinkGeneral 请求体解密结果:", decryptOutLink(res1)); // getOutLinkInfoV6 请求体加密 const test2 = JSON.stringify({ getOutLinkInfoReq: { account: "", linkID: "2qidG1XEkUKi0", passwd: "d78q", caSrt: 0, coSrt: 0, srtDr: 1, bNum: 1, pCaID: "root", eNum: 200 } }); const res2 = encryptOutLink(test2); console.log("getOutLinkInfoV6 请求体加密结果:", res2); console.log("getOutLinkInfoV6 请求体解密结果:", decryptOutLink(res2)); // getOutLinkGeneral 响应体解密 const test3 = `hRjMTT8wrhtJl02pwyDUgIeu0Z0HwkeCwsmjBdRHh4a9icP28Hh1SI37Fe804vEHgVkj+vAUz/bPbd6b2vh6VON0tZ3RRD4KmuaF7fU3b28U1LuRrZR+qyNfe4HWYStn/LPK4llYjQLbNaAF6cX1aArQm7OvmvOJhOttJZkfp5/Nvm1ldV6+kZYwAyNA7uQkcVqxWzyEVcNZOXYFCLAqkkJKOZd2K8ZJJ7M3ZiL4Gr9hfIdYaKiuUS2p4v0v6hC/G2TdTEezdzL+N2Is+fJJs2X6UXzjO/7 UwxWtP4Hv/pCMX76RNJzMKXRUcSws6yb13doXSRBV00X2wMRwLS4xPwjG6EFX2NwEiI6R67fiPCkQlwfzLZR7thoASJFIltN9tLavTqWhVq59U82beRqq0mLunRNh1FWtHRTpTmJyzZFCFD93nHCcEX9NBgmRBjzoZm+SwWTv2wjOH9eLX2G2qfxxsr+TTP6+q4QrDjShKBljVligi2W2gPcbgFb19obn4rK96nRX7tMyEcLY6vD7zFlMi8IZpSMLSxnXEcdcHix/LNa/yOoLUe1VhMyWDb6bgpDl1/IlgPMY/AAUPV7TAXeIN/T+A2Vw65t3tj+43 i6qYFBWQMfCax9MftQJl/ttOqBZPTbDbT203UdVD95LDbFGysOUlduEdJHrSb8Vmfd+wgRJZWhNoLnGD8lFtjYeD9QW1RZRy9j7kgpbp8G3MZITbW2Rfbe3BpWgBHdX76YbEdk8AVfyIInBkR8t73blVnut2hDDWnskYBJ18HHdo1M0w3wGMoeXMVfk+iDIlRfrxeNBF4m2SeJLuwz91WdrM9vaL5rSBIwJ9OLpGX1a0s4Ts9zv87HW2GbbcaSv8m8UFroo6g9nQ/cn5ohX6rBBIDqJo+eNpkdr/SQYmZzgzNXjLXCP8GRY3EMMbyutDBU60DiAM71Xn/h/lAMie4bS+jKVXo/TWban+oIBtT9jCNgAg3tWHZ7FxXuGf2h3EVboc+RmxCSSFtf/RS21uiCtFQgFlt0xATBgYxNBSL9OyG8+HyuVgTLu20xHLebDBy/c8PLdzYrxlE8W3SzE/LWnbjWeUTMdfRzDJ+hWMlVEAtn2hT1z/yIkhFlRk796uERfIHdSiL3Ik8IXLi4D395FyUCpstTO60qSAkgl+F7KPZW5dECZAcMmI6YvkQLRfqCUYxV19IXnPjjlS7Zdy8h/VqnQuL/euOv+tJxSn8TxpvftXwmZxSDeJWz94VEhl6xHwVIte4endaZLTREQA16UJkE1kb7Tfv9IQTSWmXZ6W21yfivlzmMtHHfRTtBBkQJq0GY/H3q6cUJbMEbcyZ1hynOHMBHheYf6DoLTP4Hg3nuzVaLYhkgl7wIbwhW6uELsCnn1t1co8r5phGFuil7mCXTNgL07KlyoCCGLNtAQRWFjZ/UXrLcqd4MQIHCXh1uYQQq9xFRDwg9SjDE90rsVtQqBW2WzKa8AvyruB6tboRJNHygmbAKuiV3HUa8OiPd4UOqEhmBxK1uVcUTJxbc9arFxkUQoxSYyMjSdpqJJa3Gx4UudCUFDRdYKJowV8/7 vsaRwxyMbyjBnhGguL6ZHL3mLNgGFklJOTtpQ9gJBZHngZRzxJnm6bI59tCrOSqs2Avmh4HpRyrFZNpnAb/aVr2qMOzHYp+o/ADuTb7dxN9zoYDNG8Vz1u+fdfUGFGSYw1RkjvMpmrfzO7XWa9bflc+eLoxxNzg5bOMcfeKv8DYrD7z2yf6WiYH2VLG8RCjEuHWF2laU1YWUk/cVGPUW2ndCa69LcAn33zbWeK7o7LtuPl/IwmQ6v8jV2o4vlkQaj6cmN7fHnm/LrgGV8nE588x5PiohvoYypix7hmFeiNmt/papf003qMJMeEBEr2MhR5IqA8Xt74FECoP2JjCHxzmsfllP0XQ+0 KWM1fWKR9AWNMscrgaMLeI42MSgXfzwZeJ7tK4uPBmpIOH8Z4CWUVfjxV1v+k3kF9W7cHWPqgESUv76/8 KSR6ZkZN0STpuOY20iCVJvdxyklrlHH7lsCrAJVrTptGsfMdJOJEBLfxkZbi6by6F3yOz0/RSflnkyyCYodTcq7mb7jY4ygO+XryI5b738aBTHrBX7pcFYZ2GXedPKsexVnzbI2OX2vFdneroVIUgkBIw0caA86cp9m43Fg+hTl3MPpx8Ov5pzgSlOhFxI94NlL6WLa2FHKJEcmSavtuy5SQ4qoho21qKsSv5F+JAtzSS+NI6FLnPJAl06n2xPRyB5XxkA2vfPrwaSgfEEYzDycj/XETvi3GubhV0JmciSKStFgJfN6rm6+OZH3n0CcUttLrQ5j2tbdoC8KjhEQx1wuQaBCm7BtxQXD`; const res3 = decryptOutLink(test3); console.log("getOutLinkGeneral 响应体解密结果:", res3); console.log("getOutLinkGeneral 响应体加密结果:", encryptOutLink(res3)); // getOutLinkInfoV6 响应体解密 const text4 = "q1FepUXZdRCJESkrGVyAkMsyT+9 NJNaPxqtbSHUvoMsRyKS2Ju2Ed8nQR/XmD9c1hlRRRpMtR++bsEbNRKL6Z9dvrqioStjUN3Cfi41ANo8YDbXvqvVfIosSGWym73S7+UxadvzDsLFwx6sgAOxMWhoyY2Lkcmt9YkI6oNAYmf5AZUgUhl/oSuXg4PJYOk1MimRv5etgqpTvwMQwQHRsZt4FPOlSLq6bL3R721PUQ3049/UBrom92I0FYGQJ6kjP1I7fRrC1yj2RPiqtVTOv3dsldvtaDj0j9dxkMhBiW3kwzN4cAMld60Q3llLEuaNcwmMANNeKjaeyEpXUUgtDgEIrL9+kSC/Qpkll3rh27uF3lUG4eLB5Ij0a6ABG+zHSau3gGM8/vrFWKOigdAlq2zMaa/Zp3hIp2rBEAKRt+YIR4hC9BnlxrP8d9Wm7vJB/EGWWiHb2kkiULpI5DFToX1w/8 jSvr3XuGtg9JopuRbK4Z6HJYRaJ9D+45 yHyYurSucqzakgDJER1WpfM3UZNcBvD2xgkbUb0vUdiVCvqz1E+/0I+OEzVb3p/w6ARI3SHENQGLTvdCkpW9HmAIWDwz8ONl6v2/8 yqAZFVpwJYmfqrYjUyWXmZZwsoNBgE5fg+SE2nkb90I7frKqRNiRfu7+V0NuL5T/dHHCaEXxuVxR3dm7h9hDmh/9 fnTWBTSIld4sKBmQY8wJNDziy0guKNOVO1TpSAcCWXUcpc913s1ycVWPY6eGfohZUrMu0C3WmuxGQEVHD3EPaU17fBCmxaGLm5SqaNY/g+P0kGNw0SZFybo/K6rk3c24M2zrSR6YiN2TGc+9 YpDDnV0PUH0vfcgThw8EPpmx0pJ4AgfqsbxYXOwo3OpMkiVZWjkfUj2yZiRypd+RybH7iJpd141kp8Y+H4r/o47GJ8D72D74f3AI25lJz0jtdnRE/UHJR9VAIRL9gTYVIxupObrJUcXbVEZ1sCEVx9NyZssoUiaTwDNazaLqHnmelCaqoetNEdWIt8" const res4 = decryptOutLink(text4); console.log("getOutLinkInfoV6 响应体解密结果:", res4); console.log("getOutLinkInfoV6 响应体加密结果:", encryptOutLink(res4)); 参考内容 139cloudsecret

-
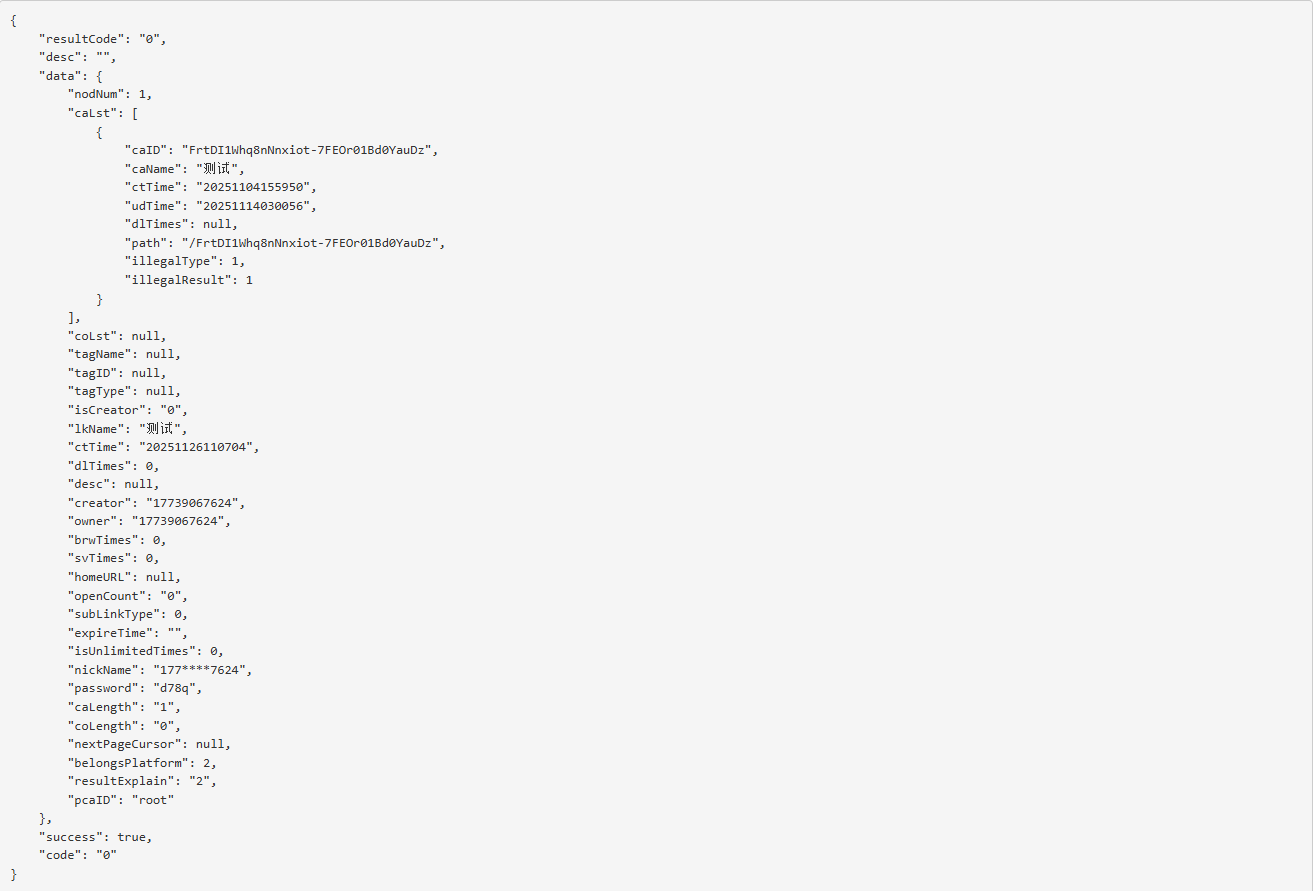
移动云盘 Python 库使用文档 1. 配置与初始化 初始化 Yun139 会话: from Yun139 import Yun139Session # token要求为移除Basic 前缀的token Yun139Session = Yun139Session(token="你的Token")2. 刷新 Token # 刷新token status, result = Yun139Session.refresh_token() # 说明: # 1. 刷新token后,实例会自动更新token # 2. token有效期小于15天才可以刷新3. 文件管理 3.1 创建文件管理实例 from Yun139 import Yun139FileManager yun139_file = Yun139FileManager(session=Yun139Session)3.2 移动文件/文件夹 status, result = yun139_file.move_file( src_fids=["文件ID1", "文件ID2"], dst_pdir_fid="目标文件夹ID" ) # 返回示例 # True {"taskId": "1813463306615229568"} # 说明:获取任务ID后,可通过查询任务状态接口查询任务执行结果3.3 重命名文件/文件夹 status, result = yun139_file.rename_file( fid="文件ID", new_name="新文件名.png" ) # 返回示例 # True { # "success": true, # "code": "0000", # "message": "请求成功", # "data": { # "fileId": "FjyKEUGVXXmeU1zaXq1xO1JzHSVgVV0zn", # "parentFileId": "FrtDI1Whq8nNnxiot-7FEOr01Bd0YauDz", # "name": "2.png", # ... # } # }3.4 删除文件/文件夹 status, result = yun139_file.remove_file(fids=["文件ID1", "文件ID2"]) # 返回示例 # True { # "taskId": "1813468597285129984", # "batchFileResults": null # }4. 文件夹管理 4.1 创建文件夹管理实例 from Yun139 import Yun139FolderManager yun139_folder = Yun139FolderManager(session=Yun139Session)4.2 创建文件夹 status, result = yun139_folder.create_folder( folder_name="创建文件夹测试", pdir_fid="/" ) # 返回示例 # True { # "parentFileId": "/", # "fileId": "Fqkd1QUxDEyTTkHUC5mdPNrmiuEk8QwGk", # "type": "folder", # "fileName": "创建文件夹测试", # ... # }4.3 获取文件列表 # 第一页 status, result = yun139_folder.get_lists( pdir_fid="文件夹ID", size=50, cursor=None, sort_by="file_name", sort_order="asc" ) # 第二页 status, result = yun139_folder.get_lists( pdir_fid="文件夹ID", size=50, cursor="0|[57-0-0,12-0-1][JzlYdEZEWk8zMEZ0UjlaRjdIM0ZxLUc3MFpWMzBaZEhfYWUxVU1laUhicHlXYnRWLSc=,J0ZpcUlmVDFyNUlGRHc4MHhSenkxRzVwbEgwa2NxLVRMUSc=]", sort_by="file_name", sort_order="asc" ) # 參數説明 # cursor:首页为None,还有文件的话会返回nextPageCursor # 返回示例 # True { # "items": [ # { # "fileId": "Fiy3GykVcP9lxL8gNU1VJupjIC8I1XC1Z", # "parentFileId": "Fn_WtHq4W6j7l6Vvh1zZI1YwQYBbeFvi-", # "name": "跳转浏览器打开.jpg", # ... # } # ], # "nextPageCursor": null # }5. 分享链接管理 5.1 创建分享链接实例 from Yun139 import Yun139ShareManager yun139_share = Yun139ShareManager(session=Yun139Session)5.2 创建分享链接 status, result = yun139_share.create_share( title="分享7天测试", url_type=0, fid_list=["文件ID1"], fld_list=["文件夹ID1"], expired_time=7 ) # 返回示例 # True { # "result": { # "resultCode": "0", # "resultDesc": "" # }, # "getOutLinkRes": { # "getOutLinkResSet": [ # { # "objID": "aab3b2f8d00e491da36b466052d94a5a", # "passwd": "q9su", # "linkID": "2qidFfUiQDtnx", # "linkUrl": "https://yun.139.com/shareweb/#/w/i/2qidFfUiQDtnx", # "linkUrlMin": null # } # ] # } # }6. 任务管理 6.1 创建任务管理实例 from Yun139 import Yun139TaskManager yun139_task = Yun139TaskManager(session=Yun139Session)6.2 查询任务状态 status, result = yun139_task.get_task_status(task_id="任务ID") # 返回示例 # True { # "taskInfo": { # "taskId": "1813463306615229568", # "status": "Succeed", # "progress": 100, # "createdAt": "2025-11-07T02:27:52.000+08:00", # "startedAt": "2025-11-07T02:27:52.000+08:00", # "finishedAt": "2025-11-07T02:27:52.000+08:00", # "code": null, # "message": null, # "taskType": 2 # }, # "batchFileResults": [...], # "extraData": { # "totalProcess": 0, # "consumedProcess": 3 # } # }7. 文件上传 7.1 创建上传实例 from Yun139 import Yun139UploadManager yun139_upload = Yun139UploadManager(session=Yun139Session)7.2 上传文件 def progress(percent): print(f"上传进度: {percent}%") status, result = yun139_upload.upload_file( file_name="cc.zip", file_path="cc.zip", pdir_fid="目标文件夹ID", progress_callback=progress ) # 返回示例 # 上传进度: 100% # True { # "fileId": "Fvwh5Wdjb6pl8BXzvEgpGhazttFGo2_gZ", # "parentFileId": "FrtDI1Whq8nNnxiot-7FEOr01Bd0YauDz", # "name": "cc.zip", # "description": null, # "type": "file", # "fileExtension": "zip", # "category": "zip", # "createdAt": "2025-11-07T03:58:36.440+08:00", # "updatedAt": "2025-11-07T03:58:37.561+08:00", # ... # }8. 文件下载 8.1 创建下载实例 from Yun139 import Yun139DownManager yun139_download = Yun139DownManager(session=Yun139Session)8.2 获取下载链接 status, result = yun139_download.get_download_url(fid="文件ID") # 返回示例 # True { # "fileId": "FqRfdx22osqO-tU0ZvV1Nb7ryEM8dqKAj", # "errCode": null, # "message": null, # "url": "https://b22-obs-ykj-01.obs.cidc-rp-2006.joint.cmecloud.cn/...", # "expiration": "2025-11-07T03:20:13.396+08:00", # "size": 32029905, # "cdnUrl": "https://yun.mcloud.139.com:443/cdnv1/20241023/FqF8bFyjxCaPMGZCsjbNHSLngJhZUcQMj.pdf?sign=...", # "cdnSwitch": false, # ... # }9. 打印输出 所有接口返回均为 (status, result),可直接打印: import json print(status, json.dumps(result, ensure_ascii=False, indent=2))10. 其他说明 各接口参数请参考注释及返回示例。 任务型操作(如移动、删除等)返回 taskId 后,可用任务管理接口查询进度。 分享链接创建后会返回链接URL和提取码等信息。 代码下载 cloud_driver_sdk 参考文献 openList
-
UTS编写字符串编解码/加密插件(安卓及鸿蒙端) 全局说明 编写说明 uts在安卓端编译为kotlin,所以,使用可以使用安卓自带库+kotlin的方法来实现 uts在鸿蒙端编译为ArkTs,ArkTs和UTS很相似,包括一些方法都一样,所以可以直接从ArkTs的文档里复制代码,稍微修改即可使用。 使用的库 安卓端 import MessageDigest from 'java.security.MessageDigest'; import BigInteger from 'java.math.BigInteger'; import Base64 from 'java.util.Base64'; 鸿蒙端 import util from '@ohos.util'; import { cryptoFramework } from '@kit.CryptoArchitectureKit';插件接口定义 /** * interface.uts * uts插件接口定义文件,按规范定义接口文件可以在HBuilderX中更好的做到语法提示 */ /** * 哈希算法枚举 */ export type HashAlgorithm = | "MD5" | "SHA1" | "SHA224" | "SHA256" | "SHA384" | "SHA512" /** * 哈希加密返回结果 */ export type HashResult = { hash: string } /** * 哈希加密函数定义 */ export type HashFunction = (input: string, algorithm: HashAlgorithm) => string1. Base64编解码 安卓端 /** * BASE64编码方法 * * @param input 输入字符串 * @return BASE64加密后的字符串 */ export const Base64Encode = function (input: string) : string { try { // 将字符串转换为字节数组 // toByteArray()为kotlin的方法 const inputBytes = input.toByteArray(); // 使用Base64编码器进行编码 const encodedBytes = Base64.getEncoder().encodeToString(inputBytes); // 将编码后的字节数组转换为字符串 return encodedBytes; } catch (e) { console.error("BASE64加密错误:", e); return ""; } } /** * BASE64解码方法 * * @param input 输入字符串 * @return BASE64解密后的字符串 */ export const Base64Decode = function (input: string) : string { try { // 将Base64字符串转换为字节数组 const decodedBytes = Base64.getDecoder().decode(input); // 将Java字节数组转换为UTS字符串 return new String(decodedBytes); } catch (e) { console.error("BASE64解密错误:", e); return ""; } } 鸿蒙端 /** * BASE64编码方法 * * @param input 输入字符串 * @return BASE64加密后的字符串 */ export const Base64Encode = function (input: string) : string { let textEncoder = new util.TextEncoder("utf-8"); let uint8Array = textEncoder.encodeInto(input); let base64Helper = new util.Base64Helper(); return base64Helper.encodeToStringSync(uint8Array); } /** * BASE64解码方法 * * @param input 输入字符串 * @return BASE64解密后的字符串 */ export const Base64Decode = function (input: string) : string { let Base64Helper = new util.Base64Helper(); let arr = Base64Helper.decodeSync(input) let textDecoder = util.TextDecoder.create('utf-8'); return textDecoder.decodeToString(arr); } 消息摘要计算 HASH加密使用统一方法,包含MD5、SHA1、SHA224、SHA256、SHA384、SHA512 安卓端 /** * 统一哈希加密方法 * * @param input 输入字符串 * @param algorithm 哈希算法枚举 * @return 哈希加密后的十六进制字符串 */ export const hash : HashFunction = function (input : string, algorithm: HashAlgorithm) : string { try { // 创建MessageDigest实例 const md = MessageDigest.getInstance(algorithm); // 输入数据转化为字节数组 const dataArray = input.toByteArray() // 计算哈希值 const hashBytes = md.digest(dataArray); // 转换为十六进制字符串 const result = BigInteger(1, hashBytes).toString(16) return result; } catch (e) { // 方法出错时返回空字符串 console.error(`${algorithm}加密错误:`, e); return ""; } }鸿蒙端 /** * 统一哈希加密方法 * * @param input 输入字符串 * @param algorithm 哈希算法枚举 * @return 哈希加密后的十六进制字符串 */ export const hash : HashFunction = function (input : string, algorithm: HashAlgorithm) : string { try { // 创建哈希实例 let md = cryptoFramework.createMd(algorithm); // 使用同步方法更新数据 let textEncoder = util.TextEncoder.create('utf-8'); let dataBlob : cryptoFramework.DataBlob = { data: textEncoder.encodeInto(input); }; md.updateSync(dataBlob); // 使用同步方法计算摘要 let mdResult : cryptoFramework.DataBlob = md.digestSync(); // 转换为十六进制字符串 let result = Array.from(mdResult.data).map(byte => byte.toString(16).padStart(2, '0')).join(''); return result; } catch (e) { // 方法出错时返回空字符串 // console.error(`${algorithm}加密错误:`, e); return ""; } }规范调用方法 这里安卓端和鸿蒙端相同 // MD5加密 export const MD5 = function (input: string) : string { return hash(input, 'MD5') } // SHA1加密 export const SHA1 = function (input: string) : string { return hash(input, 'SHA1') } // SHA224加密 export const SHA224 = function (input: string) : string { return hash(input, 'SHA224') } // SHA256加密 export const SHA256 = function (input: string) : string { return hash(input, 'SHA256') } // SHA384加密 export const SHA384 = function (input: string) : string { return hash(input, 'SHA384') } // SHA512加密 export const SHA512 = function (input: string) : string { return hash(input, 'SHA512') }使用方法 import * as KhCrypto from '@/uni_modules/kh-crypto' const input = ref<string>('待加密字符串'); const output = ref<string>('') // base64编码 output.value = KhCrypto.Base64Encode(inputText.value) // base64解码 output.value = KhCrypto.Base64Decode(inputText.value) // MD5加密 output.value = KhCrypto.MD5(inputText.value) // SHA1加密 output.value = KhCrypto.SHA1(inputText.value) // SHA224加密 output.value = KhCrypto.SHA224(inputText.value) // SHA256加密 output.value = KhCrypto.SHA256(inputText.value) // SHA384加密 output.value = KhCrypto.SHA384(inputText.value) // SHA512加密 output.value = KhCrypto.SHA512(inputText.value)插件源码 kh-crypto - DCloud插件市场 参考文档 在uts中如何将字符串转换为ByteArray Base64Helper - 鸿蒙开发API参考 消息摘要计算介绍及算法规格 - 鸿蒙开发指南
-
Android Studio最新版汉化教程(2025年10月17日) 下载语言包插件 Android Studio没有官方的中文语言包,使用IntelliJ的代替 点击下载 修改插件信息 解压压缩包 打开文件夹,向下寻找,找到lib文件夹下的jar包 lib文件夾图片 解压jar包 找到META-INFO文件夹并打开 META-INFO文件夾图片 打开plugin.xml文件 修改版本号为你的Android Studio版本号 修改版本号图片 保存文件,并将解压出来的所有文件重新打包为zip 重新打包为zip图片 修改压缩包zip后缀为jar 修改后缀名图片 安装插件 打开Android Studio,选择从磁盘安装语言包插件 安装语言包图片 打开设置,搜索lang,找到Language and Region,修改语言为中文 修改语言图片 重启Android Studio即可 修改完成图片 参考内容 Android Studio 中文汉化教程 android studio导入中文包