找到
10
篇与
DC
相关的结果
- 第 2 页
-
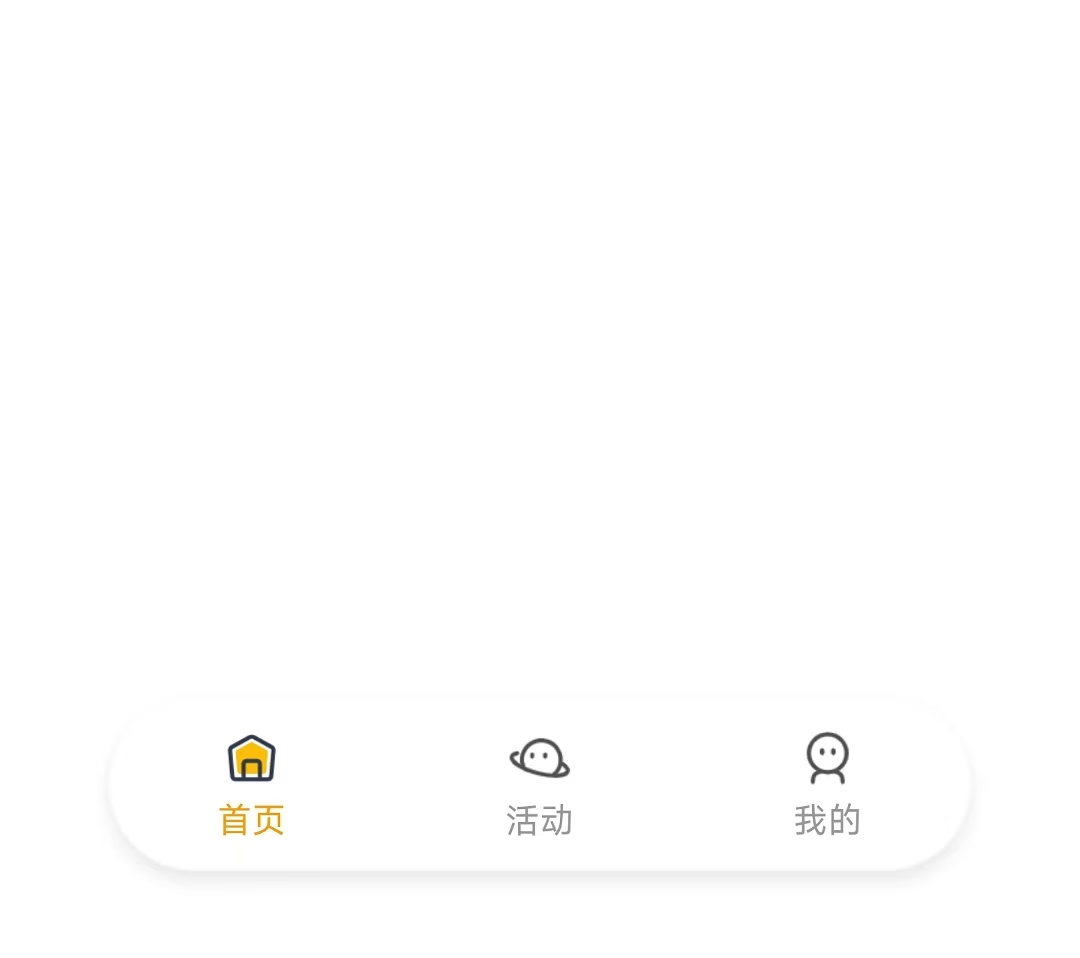
 uniapp-x实现自定义tabbar uniapp-x自带导航栏位置固定,且UI无法修改。如果需要适配自己的应用UI及色彩就需要自定义tabbar。 实现说明 将tabbar写入主页面,需要显示的页面作为组件引入。 示例样式 演示示例图片 实现方法 使用swiper实现 说明: 所有页面一次性加载 允许左右滑动 优点:允许滑动切换,用户体验升级 演示代码 <template> <!-- 页面内容区域 --> <swiper style="flex: 1;" :current="selectedIndex" @change="swiperChange"> <swiper-item item-id="index"> <IndexPage></IndexPage> </swiper-item> <swiper-item item-id="more"> <MorePage></MorePage> </swiper-item> <swiper-item item-id="user"> <UserPage></UserPage> </swiper-item> </swiper> <!-- tabber区域 --> <view class="tab-bar-container"> <view v-for="(item, index) in tabList" class="tab-bar-item" @click="switchTab(index)"> <image class="tab-bar-icon" :src="(selectedIndex === index ? item.s_icon : item.icon)"></image> <text class="tab-bar-text" :style="'color:' + (selectedIndex === index ? '#F59E0B' : '#999999') +';'">{{ item.name }}</text> </view> </view> </template> <script setup lang="uts"> // 导入页面 import IndexPage from "./tabbar/index.uvue" import MorePage from "./tabbar/more.uvue" import UserPage from "./tabbar/user.uvue" // tabbar接口类型 type TabInfo = { name : string, icon : string, s_icon : string } // 页面列表 const tabList = reactive<TabInfo[]>([ { name: "首页", icon: "/static/tabbar/home.png", s_icon: "/static/tabbar/home_selected.png" }, { name: "活动", icon: "/static/tabbar/more.png", s_icon: "/static/tabbar/more_selected.png" }, { name: "我的", icon: "/static/tabbar/user.png", s_icon: "/static/tabbar/user_selected.png" } ]) // 选中的页面 const selectedIndex = ref<number>(0) // swiper切换 const swiperChange = (e: UniSwiperChangeEvent) => { let index = e.detail.current if (selectedIndex.value === index) return selectedIndex.value = index } // 页面切换 const switchTab = (index : number) => { if (selectedIndex.value === index) return selectedIndex.value = index } </script> <style lang="scss"> .tab-bar-container { position: fixed; bottom: 60rpx; width: 80%; left: 10%; z-index: 999; display: flex; flex-direction: row; justify-content: space-around; height: 120rpx; border-radius: 60rpx; box-shadow: 0 4rpx 20rpx rgba(0, 0, 0, 0.1); background: rgba(255, 255, 255, 0.4); } .tab-bar-item { display: flex; flex-direction: column; align-items: center; justify-content: center; padding: 15rpx 40rpx; } .tab-bar-icon { width: 44rpx; height: 44rpx; margin-bottom: 8rpx; } .tab-bar-text { font-size: 24rpx; } </style>官方示例 说明: 单次只加载一个页面 加载成功后使用v-show控制显示/隐藏,不重复加载(官方使用CSS属性visibility控制,测试不行) 优点:分页加载,减小单次加载压力(如果页面DOM多的话) 演示代码 <template> <!-- 页面内容区域 --> <view style="flex: 1;"> <IndexPage v-if="tabList[0].init" v-show="selectedIndex==0"></IndexPage> <MorePage v-if="tabList[1].init" v-show="selectedIndex==1"></MorePage> <MorePage v-if="tabList[2].init" v-show="selectedIndex==2"></MorePage> </view> <!-- tabber区域 --> <view class="tab-bar-container"> <view v-for="(item, index) in tabList" class="tab-bar-item" @click="switchTab(index)"> <image class="tab-bar-icon" :src="(selectedIndex === index ? item.s_icon : item.icon)"></image> <text class="tab-bar-text" :style="'color:' + (selectedIndex === index ? '#F59E0B' : '#999999') +';'">{{ item.name }}</text> </view> </view> </template> <script setup lang="uts"> // 导入页面 import IndexPage from "./tabbar/index.uvue" import MorePage from "./tabbar/more.uvue" import UserPage from "./tabbar/user.uvue" // tabbar接口类型 type TabInfo = { init: boolean, name : string, icon : string, s_icon : string } // 页面列表 const tabList = reactive<TabInfo[]>([ { init: true, name: "首页", icon: "/static/tabbar/home.png", s_icon: "/static/tabbar/home_selected.png" }, { init: false, name: "更多", icon: "/static/tabbar/more.png", s_icon: "/static/tabbar/more_selected.png" }, { init: false, name: "我的", icon: "/static/tabbar/user.png", s_icon: "/static/tabbar/user_selected.png" } ]) // 选中的页面 const selectedIndex = ref<number>(0) // 页面切换 const switchTab = (index : number) => { if (selectedIndex.value === index) return if (!tabList[index].init) { tabList[index].init = true } selectedIndex.value = index } </script> <style lang="scss"> .tab-bar-container { position: fixed; bottom: 60rpx; width: 80%; left: 10%; z-index: 999; display: flex; flex-direction: row; justify-content: space-around; height: 120rpx; border-radius: 60rpx; box-shadow: 0 4rpx 20rpx rgba(0, 0, 0, 0.1); background: rgba(255, 255, 255, 0.4); } .tab-bar-item { display: flex; flex-direction: column; align-items: center; justify-content: center; padding: 15rpx 40rpx; } .tab-bar-icon { width: 44rpx; height: 44rpx; margin-bottom: 8rpx; } .tab-bar-text { font-size: 24rpx; } </style>其他方法 使用share-element组件实现 复制官方代码,偶先切换页面组件闪动问题。官方uniapp-xapp的demo测试正常,不知道申明原因。 使用components组件+share-element组件实现的tabbar组件实现,tabbar组件会出现与页面移入方向反向滑动的动画 share-element文档 静态资源 tabbar图标(png) 下载地址:https://www.khkj6.com/usr/uploads/2025/08/2337268233.zip 提取码:
-
夸克网盘python sdk库 Quark 网盘 Python 库使用文档 1. 配置与初始化 首先,准备 config.yaml 配置文件,内容示例: quark: cookie: "你的cookie"在代码中读取配置并初始化 Quark 会话: import yaml from Quark import QuarkSession with open("config.yaml", "r", encoding="utf-8") as f: config = yaml.safe_load(f) quark_conf = config["quark"] QuarkSession = QuarkSession(cookie=quark_conf["cookie"])2. 检查 Cookie 是否有效 status, result = QuarkSession.get_user_info()3. 文件管理 3.1 创建文件管理实例 from Quark import QuarkFileManager quark_file = QuarkFileManager(session=QuarkSession)3.2 获取文件夹内列表 status, result = quark_file.get_lists( pdir_fid="文件夹ID", page=1, size=10, sort_by="file_name", sort_order="asc" )3.3 移动文件/文件夹 status, result = quark_file.move_file( src_fids=["文件ID1", "文件ID2"], dst_pdir_fid="目标文件夹ID" ) # 返回示例 # True {"task_id": "...", "finish": true}3.4 重命名文件/文件夹 status, result = quark_file.rename_file("文件ID", new_name="新文件名.png") # 返回示例 # True {}3.5 删除文件/文件夹 status, result = quark_file.remove_file(fids=["文件ID1", "文件ID2"]) # 返回示例 # True {"task_id": "...", "finish": false}4. 文件夹管理 4.1 创建文件夹管理实例 from Quark import QuarkFolderManager quark_folder = QuarkFolderManager(session=QuarkSession)4.2 创建文件夹 status, result = quark_folder.create_folder( folder_name="创建测试", pdir_fid="父文件夹ID" ) # 返回示例 # True {"finish": true, "fid": "..."}5. 分享转存 5.1 创建转存实例 from Quark import QuarkSaveManager quark_save = QuarkSaveManager(session=QuarkSession)5.2 获取分享信息 status, result = quark_save.get_share_info(text="分享文本") # 返回示例 # True {"pwd_id": "...", "passcode": "..."}5.3 获取分享链接 stoken status, result = quark_save.get_share_stoken(pwd_id="...", passcode="...") # 返回示例 # True {"stoken": "...", ...}5.4 获取分享链接文件列表 status, result = quark_save.get_share_list( pwd_id="...", stoken="...", pdir_fid="0", # 根目录 page=1, size=10, sort_by="file_name", sort_order="asc" )5.5 转存全部/部分文件到网盘 全部转存: status, result = quark_save.save_share_file( pwd_id="...", stoken="...", to_pdir_fid="目标文件夹ID", pdir_save_all=True ) # 返回示例 # True {"task_id": "..."}部分转存: status, result = quark_save.save_share_file( pwd_id="...", stoken="...", to_pdir_fid="目标文件夹ID", fid_list=["文件ID1", "文件ID2"], share_token_list=["token1", "token2"], pdir_save_all=False ) # 返回示例 # True {"task_id": "...", ...}6. 分享链接管理 6.1 创建分享链接实例 from Quark import QuarkShareManager quark_share = QuarkShareManager(session=QuarkSession)6.2 创建分享链接 status, result = quark_share.create_share( fid_list=["文件ID1", "文件ID2", "文件ID3"], title="分享标题", expired_type=1, # 1=永久,2=7天等 url_type=1 # 1=公开,2=私密等 ) # 返回示例 # True { # "task_id": "2b6a31c873dc4a1ba72c6825d5199351", # "task_sync": false # } fid_list:要分享的文件/文件夹ID列表 title:分享标题 expired_type:过期类型(如1为永久,2为7天等) url_type:链接类型(如1为公开,2为私密等) 创建分享后会返回 task_id,可用任务管理接口查询进度,分享成功后可通过 get_share_info 获取分享链接等详细信息。6.3 获取分享链接信息 status, result = quark_share.get_share_info(share_id="分享ID") # 返回示例 # True {"title": "...", "share_url": "...", ...}7. 任务管理 7.1 创建任务管理实例 from Quark import QuarkTaskManager quark_task = QuarkTaskManager(session=QuarkSession)7.2 获取任务状态 status, result = quark_task.get_task_status(task_id="任务ID", retry_index=0) # status=0 未完成,status=2 成功 # share_id 可用于获取分享链接信息8. 文件上传 8.1 创建上传实例 from Quark import QuarkUploadManager quark_upload = QuarkUploadManager(session=QuarkSession)8.2 上传文件 def progress(percent): print(f"上传进度: {percent}%") status, result = quark_upload.upload_file( file_path="本地文件路径", file_name="上传文件名.zip", pdir_fid="目标文件夹ID", progress_callback=progress ) # 返回示例(云端存在同文件): # True {"finish": true, "fid": "...", ...} # 返回示例(云端不存在同文件): # True {"task_id": "...", "finish": true, "fid": "...", ...}9. 下载文件 9.1 创建下载实例 from Quark import QuarkDownManager quark_down = QuarkDownManager(session=QuarkSession)9.2 获取下载链接 fid_list = ["078d0433bd65406e83c43538a36f8ba8"] status, result = quark_down.get_download_url(fid_list=fid_list) # 返回示例: # 说明:下载文件需要携带cookie # True { # "file": { # "fid": "078d0433bd65406e83c43538a36f8ba8", # "file_name": "爱德华的小说 - 蒋蒋、朱贺.flac", # "size": 28384894, # "format_type": "audio/x-flac", # "download_url": "https://dl-pc-zb-cf.pds.quark.cn/..." # }, # "cookie": "cookie字符串" # }10. 打印输出 所有接口返回均为 (status, result),可直接打印: import json print(status, json.dumps(result, indent=4))11. 其他说明 各接口参数请参考注释及返回示例。 任务型操作(如移动、删除、转存、分享等)返回 task_id 后,可用任务管理接口查询进度。 分享相关操作需先获取 pwd_id、stoken 等参数。 如需更详细的参数说明或扩展用法,请参考源码或补充提问。 代码下载 cloud_driver_sdk 参考文献 openList
-
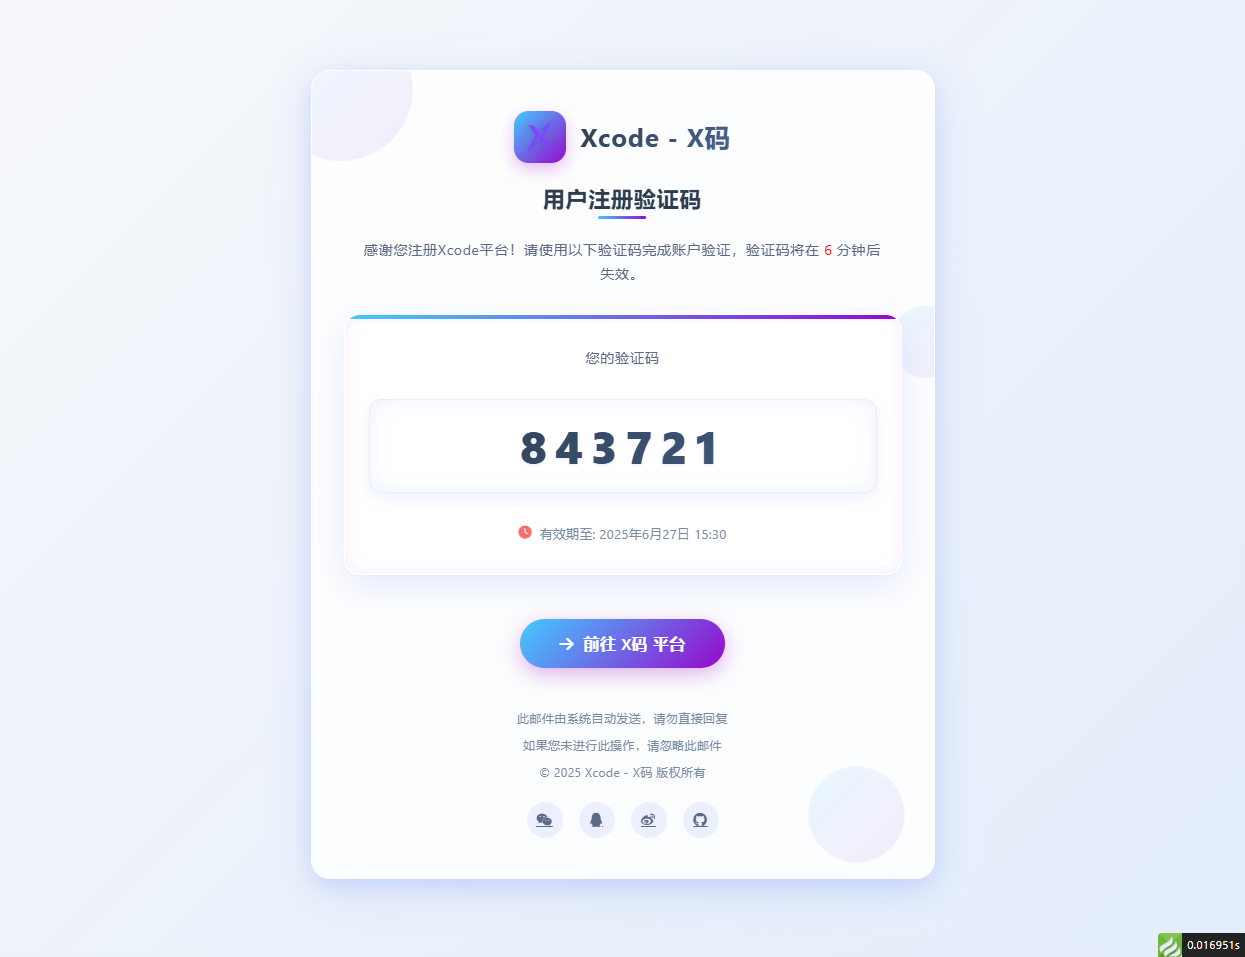
邮箱验证码html模板 适配大屏和小屏 问题:fa图标在邮件中不显示,请自行替换成图片 演示图片 大屏演示图片 代码 <!DOCTYPE html> <html lang="zh-CN"> <head> <meta charset="UTF-8"> <meta name="viewport" content="width=device-width, initial-scale=1.0"> <title>用户注册 - Xcode验证码</title> <link rel="stylesheet" href="https://cdnjs.cloudflare.com/ajax/libs/font-awesome/6.4.0/css/all.min.css"> <style> /* 基础样式重置 */ * { margin: 0; padding: 0; box-sizing: border-box; font-family: 'Segoe UI', 'PingFang SC', 'Microsoft YaHei', sans-serif; } body { background: linear-gradient(135deg, #f5f7fa 0%, #e4edfb 100%); min-height: 100vh; display: flex; justify-content: center; align-items: center; padding: 30px; letter-spacing: 0.5px; } /* 亮色毛玻璃效果容器 */ .glass-container { background: rgba(255, 255, 255, 0.85); backdrop-filter: blur(12px); -webkit-backdrop-filter: blur(12px); border-radius: 24px; border: 1px solid rgba(255, 255, 255, 0.8); box-shadow: 0 12px 40px rgba(98, 131, 252, 0.15), 0 4px 20px rgba(98, 131, 252, 0.08); width: 100%; max-width: 780px; overflow: hidden; padding: 50px 40px; position: relative; transition: all 0.4s ease; } .glass-container:hover { box-shadow: 0 15px 50px rgba(98, 131, 252, 0.2), 0 6px 25px rgba(98, 131, 252, 0.12); transform: translateY(-5px); } /* 装饰元素 */ .decoration { position: absolute; border-radius: 50%; background: linear-gradient(135deg, rgba(67, 203, 255, 0.15) 0%, rgba(151, 8, 204, 0.1) 100%); z-index: -1; opacity: 0.7; } .decoration-1 { width: 180px; height: 180px; top: -60px; left: -60px; animation: float 8s infinite ease-in-out; } .decoration-2 { width: 120px; height: 120px; bottom: 30px; right: 30px; animation: float 10s infinite ease-in-out; animation-delay: 1s; } .decoration-3 { width: 90px; height: 90px; top: 30%; right: -30px; animation: float 12s infinite ease-in-out; animation-delay: 2s; } @keyframes float { 0%, 100% { transform: translate(0, 0); } 25% { transform: translate(-10px, 15px); } 50% { transform: translate(5px, -10px); } 75% { transform: translate(10px, 5px); } } /* 头部样式 */ .header { text-align: center; margin-bottom: 40px; position: relative; } .logo { display: flex; justify-content: center; align-items: center; margin-bottom: 25px; } .logo-icon { width: 65px; height: 65px; background: linear-gradient(135deg, #43CBFF 0%, #9708CC 100%); border-radius: 18px; display: flex; justify-content: center; align-items: center; margin-right: 18px; box-shadow: 0 8px 20px rgba(151, 8, 204, 0.25); transition: all 0.3s ease; } .logo-icon:hover { transform: rotate(10deg) scale(1.05); } .logo-icon img { margin: 20%; width: 60%; height: 60%; filter: drop-shadow(0 2px 4px rgba(0, 0, 0, 0.1)); } .logo-text { font-size: 32px; font-weight: 700; background: linear-gradient(135deg, #2c3e50 0%, #4a6491 100%); -webkit-background-clip: text; background-clip: text; color: transparent; letter-spacing: 1.2px; } .title { font-size: 28px; font-weight: 700; color: #2c3e50; margin-bottom: 30px; position: relative; display: inline-block; } .title::after { content: ""; position: absolute; bottom: -8px; left: 50%; transform: translateX(-50%); width: 60px; height: 4px; background: linear-gradient(135deg, #43CBFF 0%, #9708CC 100%); border-radius: 2px; } .subtitle { font-size: 18px; color: #5a6a85; line-height: 1.7; margin: 0 auto; /* max-width: 600px; */ padding: 0 20px; } /* 验证码区域 - 亮色系突出 */ .verification-section { background: rgba(255, 255, 255, 0.95); border-radius: 20px; padding: 40px 30px; margin: 40px 0; text-align: center; backdrop-filter: blur(5px); -webkit-backdrop-filter: blur(5px); border: 1px solid rgba(255, 255, 255, 0.9); box-shadow: 0 10px 30px rgba(98, 131, 252, 0.1), inset 0 0 15px rgba(151, 8, 204, 0.05); position: relative; overflow: hidden; transition: all 0.3s ease; } .verification-section::before { content: ""; position: absolute; top: 0; left: 0; right: 0; height: 5px; background: linear-gradient(135deg, #43CBFF 0%, #9708CC 100%); } .verification-section:hover { transform: translateY(-5px); box-shadow: 0 15px 40px rgba(98, 131, 252, 0.15), inset 0 0 20px rgba(151, 8, 204, 0.08); } .verification-label { font-size: 18px; color: #5a6a85; margin-bottom: 20px; font-weight: 500; } .verification-code { width: 100%; font-size: 56px; font-weight: 800; letter-spacing: 10px; background: linear-gradient(135deg, #2c3e50 0%, #4a6491 100%); -webkit-background-clip: text; background-clip: text; color: transparent; padding: 20px 40px; border-radius: 16px; margin: 20px 0; display: inline-block; box-shadow: inset 0 0 25px rgba(98, 131, 252, 0.1), 0 8px 20px rgba(98, 131, 252, 0.1); border: 1px solid rgba(98, 131, 252, 0.15); text-shadow: 0 2px 4px rgba(0, 0, 0, 0.05); transition: all 0.3s ease; } .verification-code:hover { letter-spacing: 12px; box-shadow: inset 0 0 30px rgba(98, 131, 252, 0.15), 0 10px 25px rgba(98, 131, 252, 0.15); } .expiration { font-size: 16px; color: #7a8ca5; margin-top: 20px; display: flex; align-items: center; justify-content: center; gap: 10px; } .expiration i { color: #ff6b6b; } /* 操作区域 */ .action-section { text-align: center; margin-top: 50px; } .action-button { background: linear-gradient(135deg, #43CBFF 0%, #9708CC 100%); color: white; border: none; padding: 18px 50px; font-size: 20px; font-weight: 600; border-radius: 60px; cursor: pointer; transition: all 0.3s ease; box-shadow: 0 8px 25px rgba(151, 8, 204, 0.3); text-decoration: none; display: inline-flex; align-items: center; gap: 12px; position: relative; overflow: hidden; } .action-button::before { content: ""; position: absolute; top: 0; left: -100%; width: 100%; height: 100%; background: linear-gradient(90deg, transparent, rgba(255, 255, 255, 0.3), transparent); transition: 0.5s; } .action-button:hover::before { left: 100%; } .action-button:hover { transform: translateY(-5px) scale(1.05); box-shadow: 0 12px 35px rgba(151, 8, 204, 0.4); } .action-button:active { transform: translateY(0) scale(0.98); } .copyright-link { color: #7a8ca5; text-decoration: none; transition: all 0.3s ease; } .copyright-link:hover { color: #9708CC; text-decoration: underline; } /* 底部信息 */ .footer { text-align: center; margin-top: 50px; color: #7a8ca5; font-size: 15px; line-height: 1.7; } .footer p { margin-bottom: 8px; } .social-icons { display: flex; justify-content: center; gap: 20px; margin-top: 25px; } .social-icons a { width: 45px; height: 45px; border-radius: 50%; background: rgba(98, 131, 252, 0.1); display: flex; align-items: center; justify-content: center; color: #5a6a85; font-size: 18px; transition: all 0.3s ease; } .social-icons a:hover { background: linear-gradient(135deg, #43CBFF 0%, #9708CC 100%); color: white; transform: translateY(-5px); } /* 响应式设计 */ @media (max-width: 768px) { .glass-container { padding: 40px 30px; max-width: 100%; } .logo-icon { width: 55px; height: 55px; } .logo-text { font-size: 28px; } .title { font-size: 24px; } .subtitle { font-size: 16px; } .verification-section { padding: 30px 20px; } .verification-code { font-size: 42px; padding: 15px 30px; letter-spacing: 8px; } .action-button { padding: 16px 40px; font-size: 18px; } } @media (max-width: 480px) { .glass-container { padding: 30px 20px; } .logo { flex-direction: column; gap: 15px; } .logo-icon { margin-right: 0; } .logo-text { font-size: 26px; } .title { font-size: 22px; } .verification-section { padding: 25px 15px; } .verification-code { font-size: 36px; padding: 12px 20px; letter-spacing: 6px; } .action-button { padding: 14px 35px; font-size: 16px; } } </style> </head> <body> <div class="glass-container"> <!-- 装饰元素 --> <div class="decoration decoration-1"></div> <div class="decoration decoration-2"></div> <div class="decoration decoration-3"></div> <div class="header"> <div class="logo"> <div class="logo-icon"> <img src="http://xma.dev.khkj.xyz/static/images/logo.png" alt="Xcode Logo"> </div> <div class="logo-text">Xcode - X码</div> </div> <h1 class="title">用户注册验证码</h1> <p class="subtitle">感谢您注册Xcode平台!请使用以下验证码完成账户验证,验证码将在 <text style="color:red;">6</text> 分钟后失效。</p> </div> <div class="verification-section"> <div class="verification-label">您的验证码</div> <div class="verification-code">843721</div> <div class="expiration"> <i class="fas fa-clock"></i>有效期至: 2025年6月27日 15:30 </div> </div> <div class="action-section"> <a href="https://xma.run" class="action-button"> <i class="fas fa-arrow-right"></i>前往 X码 平台 </a> </div> <div class="footer"> <p>此邮件由系统自动发送,请勿直接回复</p> <p>如果您未进行此操作,请忽略此邮件</p> <p>© 2025 <a href="https://xma.run" class="copyright-link">Xcode - X码</a> 版权所有</p> <div class="social-icons"> <a href="#"><i class="fab fa-weixin"></i></a> <a href="#"><i class="fab fa-qq"></i></a> <a href="#"><i class="fab fa-weibo"></i></a> <a href="#"><i class="fab fa-github"></i></a> </div> </div> </div> <script> // 添加简单的交互效果 document.addEventListener('DOMContentLoaded', function() { const verificationCode = document.querySelector('.verification-code'); // 添加点击复制功能 verificationCode.addEventListener('click', function() { const text = this.innerText; const tempInput = document.createElement('input'); tempInput.value = text; document.body.appendChild(tempInput); tempInput.select(); document.execCommand('copy'); document.body.removeChild(tempInput); alert("复制成功"); }); }); </script> </body> </html>
-
PHP封装功能较全CURL函数 经常用到,之前一直重复写,今天写脚本的时候就封装了一个,方便重复利用 <?php /** * httpRequest * 发送curl请求 * * @param string $url 请求的URL * @param string $method 请求方法,默认是'GET' * @param string $back 返回类型,默认为空,可以为'all'或'cookie' * @param array $params 请求参数,默认为空数组 * @param array $headers 请求头,默认为空数组 * @return array 响应数据 * */ function sendCurlRequest($url, $method = 'GET', $back = "", $params = [], $headers = []) { // 初始化cURL会话 $ch = curl_init(); // 设置请求URL if ($method == 'GET' && !empty($params)) { $url .= '?' . http_build_query($params); } curl_setopt($ch, CURLOPT_URL, $url); // 设置请求方法 if($method == 'POST') { curl_setopt($ch, CURLOPT_POST, true); curl_setopt($ch, CURLOPT_POSTFIELDS, http_build_query($params)); } // 返回而不是输出内容 curl_setopt($ch, CURLOPT_RETURNTRANSFER, true); // 允许跟随重定向 curl_setopt($ch, CURLOPT_FOLLOWLOCATION, true); // 设置返回类型 if ($back === "all") { // 设置为true以包含响应头 curl_setopt($ch, CURLOPT_HEADER, true); // 设置为false以包含响应体 curl_setopt($ch, CURLOPT_NOBODY, false); } elseif ($back === "cookie") { // 设置为true以包含响应头 curl_setopt($ch, CURLOPT_HEADER, true); } // 设置请求头 if (!empty($headers)) { curl_setopt($ch, CURLOPT_HTTPHEADER, $headers); } // 设置超时(可选) curl_setopt($ch, CURLOPT_TIMEOUT, 30); // 执行cURL会话 $response = curl_exec($ch); // 获取HTTP状态码 $httpCode = curl_getinfo($ch, CURLINFO_HTTP_CODE); // 获取错误信息 $error = curl_error($ch); // 处理cookie $cookies = []; if ($back == "cookie" || $back == "all") { // 分离头部和主体 $header_size = curl_getinfo($ch, CURLINFO_HEADER_SIZE); $header = substr($response, 0, $header_size); if ($back == "all") { $body = substr($response, $header_size); } // 解析头部中的Cookie preg_match_all('/^Set-Cookie:\s*([^;]*)/mi', $header, $matches); foreach ($matches[1] as $item) { parse_str($item, $cookie); $cookies = array_merge($cookies, $cookie); } } // 关闭cURL会话 curl_close($ch); // 构建返回数据 if ($error) { $data = ['code' => 400, 'msg' => $error]; } else if ($httpCode >= 400) { $data = ['code' => 400, 'msg' => "HTTP error $httpCode"]; } else if ($back == "all") { $data = ['code' => 200, 'cookie' => $cookies, 'body' => $body]; } else if ($back == "cookie") { $data = ['code' => 200, 'cookie' => $cookies]; } else { $data = ['code' => 200, 'body' => $response]; } // 返回响应数据 return $data; }
-
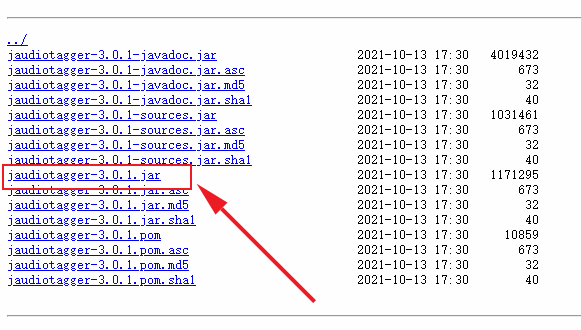
UTS引用原生jar包进行原生插件开发 也是踩了很多坑。主要的坑有两个,一个是引入jar包的问题,另一个就是jar包的使用问题(这个还得看包的文档 :@(吐血倒地) ) 下载jar包 我要用的是jaudiotagger包,引来实现对音乐标签信息的修改,包下载地址:https://central.sonatype.com/artifact/net.jthink/jaudiotagger/versions 我用的是最新的3.0.1版本,下载图中这个 lvkwkzpv.png图片 创建插件 下面是步骤: 创建插件参考官方教程步骤,这个很详细 地址: https://doc.dcloud.net.cn/uni-app-x/plugin/uts-plugin.html#%E5%88%9B%E5%BB%BAuts%E6%8F%92%E4%BB%B6 引入jar包 将你下载的jar包移动到libs目录下,如图 lvkwqa8k.png图片 导入包中的方法 java导入的方法 import org.jaudiotagger.audio.flac.FlacFile; import org.jaudiotagger.audio.generic.AudioFile; import org.jaudiotagger.audio.generic.AudioFileIO; import org.jaudiotagger.tag.FieldKey; import org.jaudiotagger.tag.Tag; import org.jaudiotagger.tag.images.Artwork;ts导入的方法 import FlacFile from "org.jaudiotagger.audio.flac.FlacFile"; import AudioFile from "org.jaudiotagger.audio.generic.AudioFile"; import AudioFileIO from "org.jaudiotagger.audio.generic.AudioFileIO"; import FieldKey from "org.jaudiotagger.tag.FieldKey"; import Tag from "org.jaudiotagger.tag.Tag"; import Artwork from "org.jaudiotagger.tag.images.Artwork";就这样导入就可以了,在Hbuilderx中,有代码提示,也可以不自己导入,写完代码,点击代码提示,又自动修复功能,当然,自动修复导入的不完全正确。 使用方法 测试的时候要打包自定义基座进行测试 使用的话,导入后就当ts方法写就行 有些报错是编译器bug不用管 // 引入java文件类 import File from "java.io.File"; import Files from "java.nio.file.Files"; // 引入jaudiotagger包 import AudioFile from "org.jaudiotagger.audio.AudioFile"; import AudioFileIO from "org.jaudiotagger.audio.AudioFileIO"; // import { Tag, FieldKey } from "org.jaudiotagger.tag"; import Tag from "org.jaudiotagger.tag.Tag"; import FieldKey from "org.jaudiotagger.tag.FieldKey"; // mp3封面相关 import StandardArtwork from "org.jaudiotagger.tag.images.StandardArtwork"; // falc封面相关 import FlacTag from "org.jaudiotagger.tag.flac.FlacTag"; import FileInputStream from "java.io.FileInputStream"; import PictureTypes from "org.jaudiotagger.tag.reference.PictureTypes"; /** * MusicInfo * 音乐信息类型 * */ type Tags = { audio: string; title: string; artist: string; album: string; cover: string; } export class KhMusicTag { /** * 私有变量 * tags { Tags } 标签信息 * action { boolean[] } 封面图片路径 * */ /** * writeMp3Tag * 写入mp3的封面图 * @param { string } cover 封面图路径 * * @returns { Boolean} 返回写入结果 */ public writeMp3Tag(info: Tags): boolean { try { // 读取音频文件 const audioFile = AudioFileIO.read(new File(info.audio)); const mp3Tag: Tag = audioFile.getTagOrCreateAndSetDefault(); // 设置歌曲名,歌手名,专辑名 mp3Tag.setField(FieldKey.TITLE, info.title); mp3Tag.setField(FieldKey.ARTIST, info.artist); mp3Tag.setField(FieldKey.ALBUM, info.album); // 创建封面图实例 const coverImage: File = new File(info.cover); // 创建Artwork对象 const artwork: StandardArtwork = new StandardArtwork(); artwork.setBinaryData(Files.readAllBytes(coverImage.toPath())); artwork.setMimeType("image/jpg"); // 根据实际封面图片类型设置 artwork.setPictureType(3); // 删除旧的封面图 mp3Tag.deleteArtworkField(); // 写入封面图 mp3Tag.setField(artwork); // 写回文件 audioFile.commit(); return true; } catch(e) { return false; } } /** * writeFlacCover * 写入flac的封面图 * @param { Tags } info 标签信息 * * @returns { Boolean} 返回写入结果 */ public writeFlacTag(info: Tags): boolean { try { // 读取flac文件,并强制申明为FlacTag类型 const audioFile = AudioFileIO.read(new File(info.audio)); const flacTag = audioFile.getTag() as FlacTag; // 设置歌曲名,歌flac手名,专辑名 flacTag.setField(FieldKey.TITLE, info.title); flacTag.setField(FieldKey.ARTIST, info.artist); flacTag.setField(FieldKey.ALBUM, info.album); // 读取封面图为字节流 const imageFile: FileInputStream = new FileInputStream(info.cover); const imagedata: ByteArray = new ByteArray(imageFile.available()); imageFile.read(imagedata); // 写入封面图 flacTag.setField(flacTag.createArtworkField(imagedata, PictureTypes.DEFAULT_ID, "image/jpg", "KHMD", 200, 200, 24, 0)); // 写回文件 audioFile.commit(); return true; } catch (e) { return false; } } }参考文献: 依据于开源的java库jaudiotagger 地址:https://bitbucket.org/ijabz/jaudiotagger/src/master/ 文档:http://jthink.net/jaudiotagger/index.jsp 成品jar包下载地址:https://central.sonatype.com/artifact/net.jthink/jaudiotagger/versions 说明:建议查看源码中的testsrc中的示例,个人觉得比文档中的示例详细和有用